
Stud finders are essential tools for anyone undertaking home renovations or DIY projects. They help locate studs, pipes, wires, and other objects hidden inside walls, ensuring safe and efficient drilling. In this article, we will provide you with valuable tips on using a stud finder to locate pipes, helping you avoid costly mistakes and potential hazards.

Understanding Stud Finder Mechanics
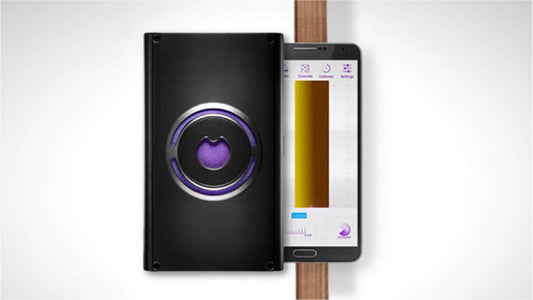
Before we dive into the tips, let's briefly understand how stud finders work. Stud finders, such as the Walabot DIY 2, utilize advanced sensing technology to detect changes in density behind walls. By scanning the wall surface, these devices can identify studs, pipes, and wires, providing you with accurate information for your drilling needs.
Choosing the Right Stud Finder for Pipes
When it comes to locating pipes, it's crucial to choose a stud finder that offers reliable detection capabilities. The Walabot DIY 2 Deluxe Bundle is an excellent choice, as it can detect metal and PVC pipes up to 4 inches deep in drywall. Its two scanning modes, Images and Expert, provide visual representations and raw data, respectively, ensuring precise identification of pipes.
Step-by-Step: Using Walabot DIY to Detect Pipes
- Prepare the area: Clear the wall surface from any obstructions, such as paintings or furniture, to ensure an unobstructed scan.
- Pair and calibrate the stud finder: Follow the manufacturer's instructions to pair the device with your phone and calibrate the stud finder properly. This step is crucial for accurate detection.
- Start scanning: Place the stud finder flat against the wall and slowly move it horizontally. Pay attention to your phone screen - a visual graphic will indicate the presence of a pipe.
- Mark the location: Once you detect a pipe, mark its location on the wall using a pencil or tape.
Common Mistakes and How to Avoid Them
While using a stud finder, it's essential to be aware of common mistakes that can lead to inaccurate readings or potential damage. Here are a few mistakes to avoid:- Insufficient calibration: Failing to calibrate the stud finder properly can result in false readings. Always follow the manufacturer's instructions for calibration.
- Inadequate surface contact: Ensure that the stud finder makes full contact with the wall surface to obtain accurate readings. Pressing too lightly or at an angle may lead to inaccurate results.
- Ignoring multiple scans: To ensure accuracy, perform multiple scans in different directions. This will help confirm the presence and location of pipes.
Using a stud finder to locate pipes is crucial for safe and efficient drilling during home renovations or DIY projects. Stud finders such as the Walabot DIY 2 are a must when it comes to getting the job right.