
Drywall is susceptible to damage ranging from minor dents to deep holes. Understanding the difference between shallow and deep damage is crucial in determining the appropriate repair approach.
Assessing the damage in your wall
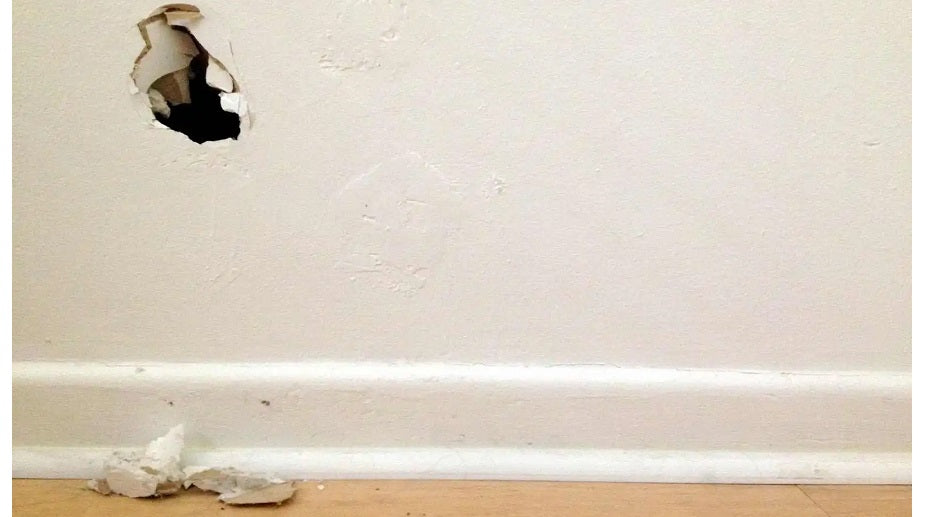
Start by examining the extent of the damage. Shallow damage usually includes small holes, dents, or scratches, typically not penetrating beneath the surface paper of the drywall. Deep damage, on the other hand, may involve larger holes or fractures that compromise the drywall's integrity.

Repairing shallow damage
- Clean the area: Remove any loose material around the damage.
- Apply joint compound: Use a putty knife to fill in the damage with joint compound. Smooth it out so it’s level with the surrounding area.
- Sanding: Once the compound dries, sand it to a smooth finish.
- Paint: Apply primer and paint to match the surrounding wall.
Addressing deep damage
Deep damage in drywall, such as large holes or significant fractures, requires a more thorough repair approach. The process begins with carefully cutting out the damaged area. This step is crucial for creating a clean, manageable space to work with. Using a drywall saw, remove the compromised section, ensuring the edges are straight and clean for easier patching.
Once the damaged drywall is removed, the next step is to prepare a support system for the new patch. This often involves securing a small backing piece inside the cavity. You can use a thin wooden board or a spare piece of drywall for this purpose. Attach this backing to the existing drywall edges using a strong adhesive or screws. This creates a stable base to which the new drywall piece can be attached.
After setting up the backing, measure and cut a new piece of drywall that precisely fits the hole. Carefully place this new piece onto the backing, ensuring its level with the wall surface. Use drywall screws to fasten it securely in place. The aim here is to make the patch as flush with the surrounding area as possible.
The final step involves covering the seams and screw heads with drywall tape and joint compound. Apply the compound over the tape, feathering the edges to blend smoothly with the existing wall. This might require several layers of joint compound, each needing proper drying time, to build up a surface level with the rest of the wall. Once dry, sand the area to a smooth finish, priming and painting it to match the rest of the wall. With patience and attention to detail, this method ensures a robust and virtually invisible repair to your drywall.
Tips for a successful repair
- Color matching: Take a sample of your wall color to your local hardware store for an exact match.
- Multiple layers: For deeper repairs, you may need to apply several layers of joint compound, allowing each layer to dry completely.
- Patience is key: Rushing the drying or sanding process can lead to less-than-desirable results.


