


Can You Mount a Heavy TV on Metal Studs?
Yes, but there's a catch: metal studs require a mounting system specifically designed and approved for the wall's construction and the intended load.
Metal studs are widely used in commercial buildings, apartments, and modern homes. They're lightweight, dimensionally consistent, and resistant to some problems associated with wood framing, such as warping.
However, their construction changes how mounting hardware works. A typical wood stud is a solid piece of lumber. A metal stud is usually made from relatively thin galvanized steel formed into a C-shaped profile.
That means you can't simply assume the lag screws supplied with a conventional TV mount will work in both materials. For light-gauge steel framing, properly rated toggle-style anchors or an engineered reinforcement system are often needed to create a secure connection.
The important point is that a metal stud isn't necessarily incapable of supporting a TV. It needs the correct attachment method, and the framing itself must be suitable for the load.
Metal Studs vs. Wood Studs: Why Mounting Hardware Matters
Before selecting your hardware, it helps to understand what happens inside the wall when you tighten a mounting bolt.
Mounting Into Wood Studs
Wood studs are solid, providing material for a lag screw or other approved structural fastener to grip. When installed at the correct location and depth, the screw threads engage the wood and transfer the load from the bracket into the framing.
This is why mounting TVs and shelving on wood studs is generally familiar territory for many DIYers.
Mounting Into Metal Studs
Metal studs are hollow, with relatively thin steel walls. Driving a conventional wood lag screw into thin steel doesn't provide the same connection as driving it into solid lumber. The threads can strip the metal, leaving the mounting hardware with insufficient holding strength.
For many approved steel-stud installations, the solution is a specialized anchor that passes through the stud and engages behind the steel. Rather than relying solely on screw threads gripping a thin metal surface, this type of anchor uses a channel or toggle to secure the bracket against the framing assembly.

| Feature | Wood Studs | Metal Studs |
|---|---|---|
| Structure | Solid lumber | Typically hollow, formed steel |
| Typical Fasteners | Approved lag screws or structural screws | Approved steel-stud toggle anchors or engineered reinforcement |
| Connection | Threads grip the wood | Anchor engages behind the metal stud |
| Drilling | Wood-compatible bit and pilot hole | Metal-compatible bit and anchor-sized hole |
| Main Consideration | Screw size and embedment | Stud position, anchor engagement and framing strength |
These are general differences. The complete mounting system must always be compatible with the actual framing and load.
Step 1: Find the Studs and Identify the Wall Construction
Every successful wall-mounting project begins with understanding what's behind the drywall. You need to know where the studs are, whether they're made of wood or metal, and what else may be concealed in the wall.
Why a Regular Stud Finder May Not Tell You Enough
Traditional electronic stud finders are primarily designed to identify changes in wall density or other physical properties associated with framing. They can be useful for locating studs, but many basic models provide limited information about the objects they detect.
Depending on the model, you may get a light or an audible signal telling you where a stud is likely located. But that doesn't necessarily answer other important questions: Is it wood or metal? Where is its center? Could plumbing or wiring be nearby? Is there another object in the wall that could interfere with drilling?
Some advanced conventional stud finders provide metal or live-wire detection, but many lack comprehensive visual wall-imaging capabilities.
Why Walabot Offers a More Complete Picture

Walabot goes beyond basic stud detection by using radio-frequency technology to detect several types of concealed objects and display them visually on a connected smartphone.
On supported surfaces, Walabot DIY 2 series scanners can help identify:
- Wood studs and their centers
- Metal studs and their centers
-
Pipes / Wire
- Metal pipes
- Plastic and PVC pipes
- Electrical wiring, including live and non-live wires
Rather than simply indicating that something is behind the wall, Walabot's Images Mode provides graphical representations that help distinguish different detected objects. Expert Mode offers a view of the raw radar data for investigating unusual or overlapping detections.
That additional information is particularly valuable when mounting into metal studs, where locating the correct fastening position and avoiding concealed utilities are both important.
How to Scan for Metal Studs With Walabot
Connect Walabot to your smartphone and open the Walabot DIY app. Hold the device flat and vertically against the wall, then complete the app-guided calibration while keeping it in contact with the surface.
Scan steadily across the planned installation area. When a metal stud is detected, use the visual display to locate its center and mark the position. Approach the stud from both sides to confirm the mark before drilling.

As Pro Home by Dodge puts it:
“And this is just going to increase the accuracy of your mark.”
— Pro Home by Dodge
A few extra moments spent confirming your mounting points can prevent misplaced holes and unnecessary drywall repairs.
Step 2: Choose the Right Anchors for Metal Studs
Once you've identified the framing, the next decision is how to attach the bracket securely. For metal studs, fastener selection is especially important.

Why Ordinary Screws Aren't Enough
A conventional wood lag screw works by embedding its threads into solid lumber. Thin-gauge steel studs don't provide the same thickness of material, so trying to use ordinary wood lag screws can result in stripped holes or an inadequate connection.
For many steel-stud TV installations, manufacturers recommend a specialized mounting kit using heavy-duty channel-style toggle anchors. These anchors pass through correctly sized holes in the wall and metal studs, then engage behind the steel to secure the bracket.
How Metal-Stud Toggle Anchors Work
A typical channel-style anchor uses a metal channel connected to a positioning mechanism. The channel is inserted through the drilled hole, turned behind the stud, and pulled into position. Once seated, it creates a threaded attachment point for the mounting bolt.
This distributes the attachment force differently from a conventional screw driven directly into the stud face.
Not every toggle anchor is suitable for every TV installation. The manufacturer must approve the specific anchor system for the stud type, wall construction, bracket configuration and intended loads. An anchor's advertised weight rating should not be treated as a universal guarantee.
Step 3: Choose a TV Mount That's Compatible With Steel Framing
Selecting a suitable TV bracket is just as important as choosing the anchors. Not every bracket offers the mounting-hole arrangement or load characteristics needed for a metal-stud installation.
Before purchasing, check the bracket's specifications, mounting-hole spacing and approved wall types.
Why Mounting-Hole Spacing Matters
Metal-stud toggle anchors require clearance behind the wall to engage properly. If the mounting holes on a TV bracket are positioned too close together, the metal channels of adjacent anchors may interfere with one another.
Choose a bracket with adequate separation between its mounting points so every anchor can engage as the manufacturer intends.
Fixed vs. Tilting vs. Full-Motion Mounts
Fixed mounts keep the TV close to the wall, limiting how far the load projects outward.
Tilting mounts allow some vertical angle adjustment while generally maintaining a relatively low profile.
Full-motion mounts use articulating arms that allow the TV to extend away from the wall and swivel. As the TV moves farther from the wall, the increased leverage can create greater bending forces on the anchors and studs.
Many steel-stud mounting kits are approved for fixed or tilting mounts, not full-motion brackets. Other engineered systems may allow different configurations, but the entire installation must be approved for the intended application.
Never assume a mounting kit approved for a fixed TV bracket is also suitable for an articulating arm.
Step 4: Plan the Installation and Mark the Mounting Holes

With the framing identified and compatible hardware selected, decide where the TV should sit. Consider comfortable viewing height, furniture placement, power outlets and cable routing.
Determine where the bracket's approved fastening points will align with the studs. Use a level to create a horizontal reference line, hold the bracket against the wall, and mark each drilling position.
Accurate positioning is especially important because steel-stud anchors must engage the framing correctly. As noted in the Pro Home by Dodge tutorial:
“This particular anchor system requires the hole to be centered on the studs.”
— Pro Home by Dodge
Other mounting systems may have different requirements, so always follow the instructions supplied with yours.
Step 5: Check for Hidden Pipes and Wires Before Drilling
Finding a stud is only one part of preparing a safe drilling location. Walls may also contain electrical wiring, water pipes, conduits and other concealed objects.
A basic stud finder might help you locate framing, but it often tells you little about what else is hidden in the surrounding wall cavity. Walabot provides a broader view by detecting different types of objects, not just studs.
Don't Just Find the Stud. Investigate the Surrounding Wall.
Before drilling, use Walabot to scan the intended mounting point and the area around it. Its ability to detect wood and metal studs, plastic and metal pipes, and electrical wiring is especially useful when planning a project involving multiple holes.
For example, a metal stud might be clearly identified, but wiring could pass through the framing near a planned drilling position. A concealed plastic pipe might also occupy part of the wall cavity.
Many basic stud finders cannot visually distinguish these objects, especially nonmetallic pipes and non-live wires. With Walabot, you can review the detected objects on your smartphone and adjust your plan when necessary. Expert Mode can provide an additional raw-radar view in more complicated situations.
No wall scanner can guarantee detection of every concealed hazard. Results depend on the wall material, depth, conditions and other factors. If the scan is ambiguous or you suspect utilities near the drilling location, investigate further or consult a qualified professional.
Walabot DIY 2 series devices are intended for supported surfaces such as drywall, plywood and OSB, not concrete, brick, traditional lath-and-plaster or metal-backed walls.
Step 6: Drill the Holes Correctly

With the mounting points marked and the surrounding wall checked, prepare the holes for your selected anchor system. Different anchors require different hole sizes and drilling methods, so use the instructions supplied with your mounting hardware.
For many steel-stud anchor systems, the hole passes through the drywall and the front face of the steel stud. Use a suitable metal-cutting drill bit and control the drilling process to avoid damaging surrounding materials.
Some methods begin by making a clean opening in the drywall to verify the steel-stud position before drilling through the metal. This can be useful when precise positioning matters, provided the approach is compatible with the manufacturer's requirements.
Most importantly, avoid enlarging the hole beyond the specified size. Pro Home by Dodge advises:
“Make sure you don't drill your hole larger than what's required for your anchors.”
— Pro Home by Dodge
An oversized or misplaced hole can prevent an anchor from engaging correctly.
Step 7: Install the Metal-Stud Anchors

With the holes properly prepared, install the anchors according to the manufacturer. For a common channel-style toggle system, the general method involves inserting the channel through the hole, positioning it behind the stud and pulling it against the framing.
The temporary positioning mechanism is then removed or adjusted as instructed, leaving a threaded attachment point for the mounting bolt.
Repeat the approved procedure at every mounting location. Before attaching the bracket, confirm that the anchors are seated correctly and that the channels have engaged as intended.
Exact steps vary by anchor model; don't substitute generic instructions for those supplied with your hardware.
Step 8: Attach and Level the TV Mount

Once the anchors are installed, position the TV bracket against the wall and align its mounting holes with the threaded attachments.
Start all approved mounting bolts loosely before fully tightening them. This gives you a chance to adjust the bracket and confirm that it's level.
After final alignment, tighten the fasteners according to the manufacturer's instructions. Avoid overtightening, which could damage the anchors, bracket or wall assembly.
Inspect all mounting points, then install the television following the bracket manufacturer's instructions, including any locking or safety mechanisms. Use enough assistance to lift a large TV safely.
Can You Use Metal-Stud Anchors for Shelves, Cabinets and Other Heavy Objects?
The same general principles apply to many wall-mounted objects: identify the framing, evaluate the expected load and choose hardware approved for the actual application.
However, different objects create different forces on a wall. A fixed TV bracket keeps most of its weight relatively close to the wall. A deep floating shelf may carry items well beyond the fastening points and create additional leverage. A cabinet loaded with dishes or tools can impose still greater demands.
Some projects require structural blocking, reinforced framing or other engineered backing rather than relying on conventional toggle anchors alone.
The heavier an object is—and the farther it projects from the wall—the more important it becomes to consider leverage and the strength of the entire mounting assembly, not just the object's weight.
Common Mistakes to Avoid When Mounting on Metal Studs
Using Wood Lag Screws in Thin Metal Framing
Fasteners intended for solid lumber are not automatically suitable for thin-gauge steel. Choose a fastening system approved for your wall.
Drilling Too Close to the Stud Edge
Inaccurate hole placement can prevent correct anchor engagement. Find and verify each mounting location carefully.
Choosing a Bracket With Incompatible Mounting-Hole Spacing
Toggle anchors need enough room behind the wall to engage without interfering with adjacent fasteners.
Using a Full-Motion Bracket With Hardware Rated Only for Fixed Mounts
Articulating arms create additional leverage. Never exceed the approved use of your anchors and mounting system.
Ignoring Hidden Wiring and Plumbing
Locating a stud doesn't mean the surrounding wall cavity is clear. A visual wall scanner like Walabot can help detect multiple types of concealed objects before drilling.
Overtightening Mounting Bolts
Excessive tightening can damage fasteners and the supporting assembly. Follow the manufacturer-specified method.
Relying on an Anchor's Advertised Weight Rating Alone
Anchor capacity depends on the wall, framing, installation method and load direction. Evaluate the complete installation.
Why Walabot Is Especially Useful for Metal-Stud Projects
Metal-stud mounting highlights a limitation of basic stud finding: knowing that a stud exists isn't always enough.
For a well-planned installation, you need to locate the framing accurately, understand its material and investigate nearby objects that could interfere with drilling.
Walabot helps address all three challenges. Its visual wall-scanning technology can detect wood and metal studs, pipes and wiring behind compatible wall surfaces. With Images Mode, detected objects appear graphically on your smartphone; with Expert Mode, you can investigate raw radar information when additional detail is helpful.
For a TV mounting project, that can make wall investigation more informative than relying on a basic stud finder that only indicates the presence of framing.
Walabot doesn't replace correct hardware or structural judgment. It helps you make better-informed decisions about where to drill and when further investigation is needed.
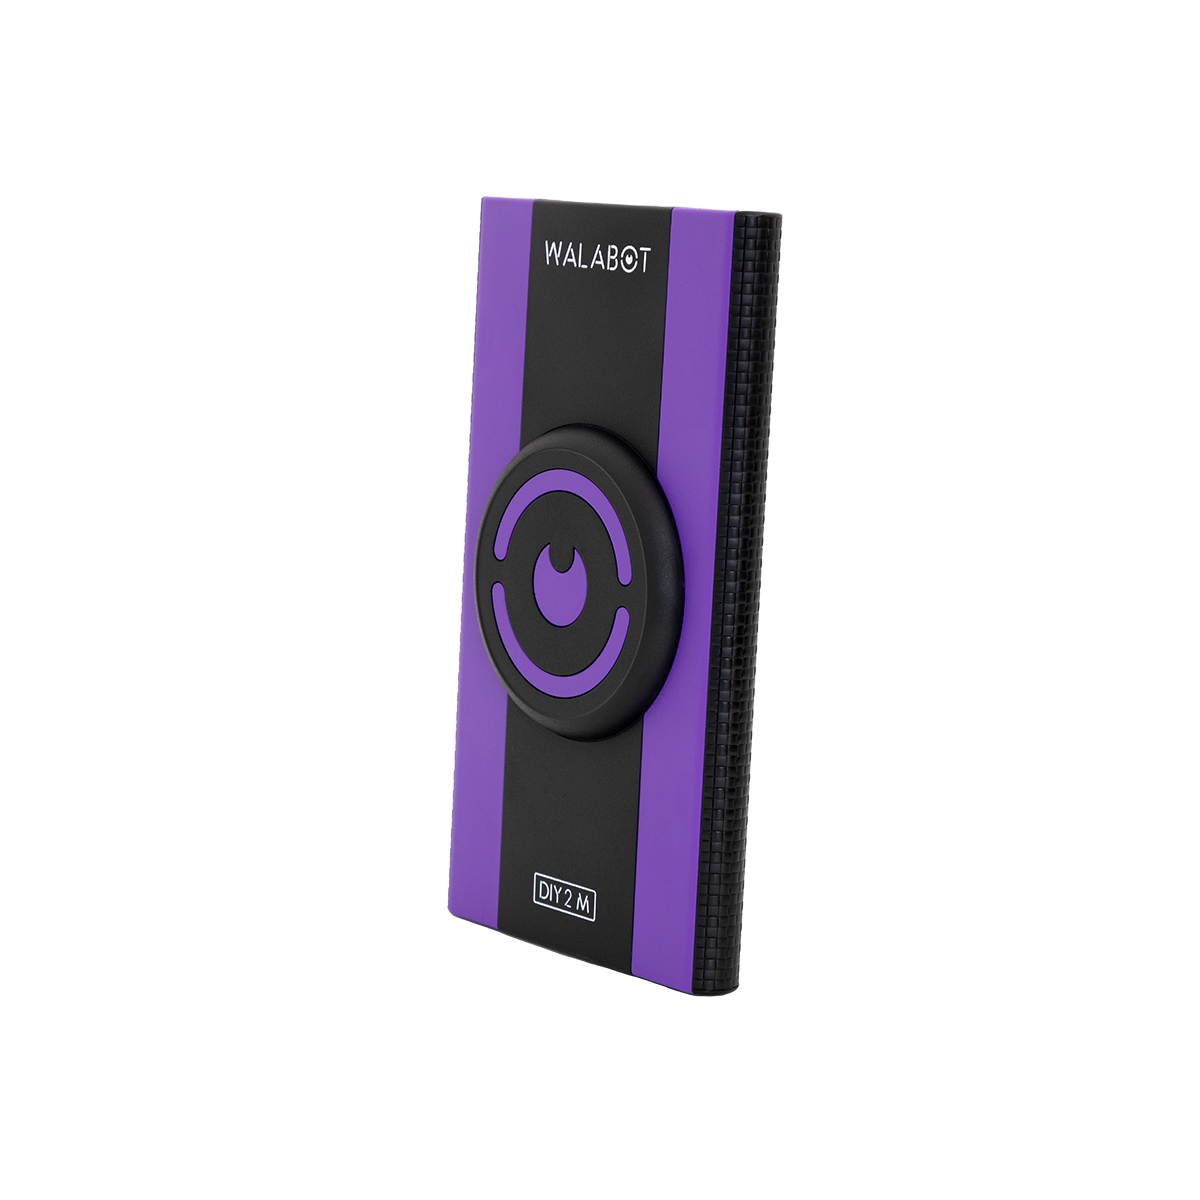
$199.95 USD $179.95 USD
Walabot DIY 2 M
See more of what's behind your walls before you drill.
- Detects wood and metal studs, pipes and wires on supported surfaces
- Compatible with iOS and Android smartphones
- Includes Images Mode and Expert Mode
- Wireless scanning with a built-in rechargeable battery
Frequently Asked Questions
Can Metal Studs Support a 65-Inch or 75-Inch TV?
Potentially, yes. Suitability depends on the television's actual weight, the steel-stud specifications, the mounting bracket and the approved fastening system—not screen size alone.
Do I Need Special Anchors to Mount a TV on Metal Studs?
For many light-gauge steel-stud installations, yes. Compatible channel-style toggle anchors or another specifically approved mounting system may be required.
Can I Use a Regular TV Mount on Metal Studs?
Only when the bracket and complete fastening method are approved for the steel-framed wall. A bracket designed for wood studs isn't automatically suitable for metal framing.
Can I Mount a Full-Motion TV Bracket on Metal Studs?
Some engineered systems allow it, but many conventional steel-stud anchor kits are approved only for fixed or tilting mounts. Confirm compatibility before installation.
How Can I Tell Whether My Wall Has Wood or Metal Studs?
A visual wall scanner such as Walabot can help distinguish detected wood and metal studs behind supported wall surfaces, providing useful information before you select mounting hardware.
Can Walabot Detect Wires and Pipes Near Metal Studs?
Yes. Walabot can detect electrical wiring, metal pipes and plastic pipes behind supported materials. This helps you investigate the wall around planned mounting points, although no scanner can guarantee that every hazard will be detected.
Can I Use the Same Mounting Approach for Heavy Shelves or Cabinets?
The principles are similar, but the fastening method must be suitable for the fixture and expected load. Heavily loaded shelves or cabinets may need structural reinforcement.
Final Thoughts: Know What's Behind Your Walls
Mounting a TV on metal studs isn't necessarily more difficult than mounting one on wood. It requires an approach appropriate for the framing behind your drywall.
The essentials are understanding the wall construction, locating the studs accurately, selecting compatible hardware and following the mounting instructions.
As the Pro Home by Dodge tutorial reminds us:
“It's important to not just understand where the studs are.”
— Pro Home by Dodge
Knowing whether your wall contains wood or metal framing—and what else may be concealed nearby—helps you plan the installation more effectively.
Instead of relying on basic stud detection alone, Walabot gives DIYers a visual way to investigate compatible walls, helping them find studs, identify concealed pipes and wires, and approach mounting projects with greater confidence.
Planning to mount a TV, install shelves or renovate your home? Discover what's behind your drywall before making the first hole.
Explore Walabot Visual Wall Scanners at Walabot.com
Watch the Original Tutorial by Pro Home by Dodge
This article draws on practical techniques and recommendations from Pro Home by Dodge (@ProHomeByDodge), together with Walabot's experience in visual wall-scanning technology and guidance from mounting-hardware manufacturers.
The video is a sponsored collaboration with Walabot. This guide provides general educational information; always follow the installation requirements for your TV mount, anchors and wall construction, and consult a qualified professional when structural suitability is uncertain.


